
There are few conveniences in modern home ownership quite like the garage door opener. It’s the unsung hero that welcomes you home on a rainy evening, saving you from the elements with the simple press of a button. But when that remote stops working—or when you need to program a new one—that convenience quickly turns into frustration.
At Loveland Garage Door Service, we believe that managing your home’s access shouldn’t be a headache. Whether you’ve just purchased a replacement remote, moved into a new home, or simply need to reset your system for security reasons, programming a garage door opener remote is a task you can often handle yourself. This guide will walk you through the process for the most common openers, including LiftMaster, Genie, and Chamberlain, and help you troubleshoot pesky signal issues.
Step 1: Identify Your Opener Type
Before you climb that ladder, you need to know what kind of technology you are working with. Garage door openers generally fall into two categories: modern Rolling Code systems and older Dip Switch systems.
- Rolling Code (The “Learn” Button) Most openers manufactured after 1993 use rolling code technology for enhanced security. The key to programming these is the “Learn” button (sometimes labeled “Smart” button).
- Location: Look on the back or side panel of your garage door motor unit, near where the antenna wire hangs down. You may need to pop off the light lens cover to find it.
- The Color Matters: For Chamberlain, LiftMaster, and Craftsman units, the color of this button tells you the frequency and compatibility:
- Yellow: Security+ 2.0 (Newest models)
- Purple: Security+ 315 MHz
- Red or Orange: Security+ 390 MHz
- Green: Billion Code (Older models)
- Dip Switches (Fixed Code) If your opener is from the 80s or early 90s, it might use a set of tiny switches (Dip switches) to set the code. These are becoming rare but are still found in some Loveland homes.
Step 2: Programming a Rolling Code Remote
This process works for the vast majority of modern openers, including LiftMaster, Chamberlain, Craftsman, and Genie.
Note: You will need a stepladder to reach the motor unit. Please ensure it is stable before climbing.
- Prepare the Remote: If your remote is brand new, ensure the battery is installed and the plastic pull-tab is removed.
- Locate the Learn Button: Ascend your ladder and find the colored Learn button on the motor unit.
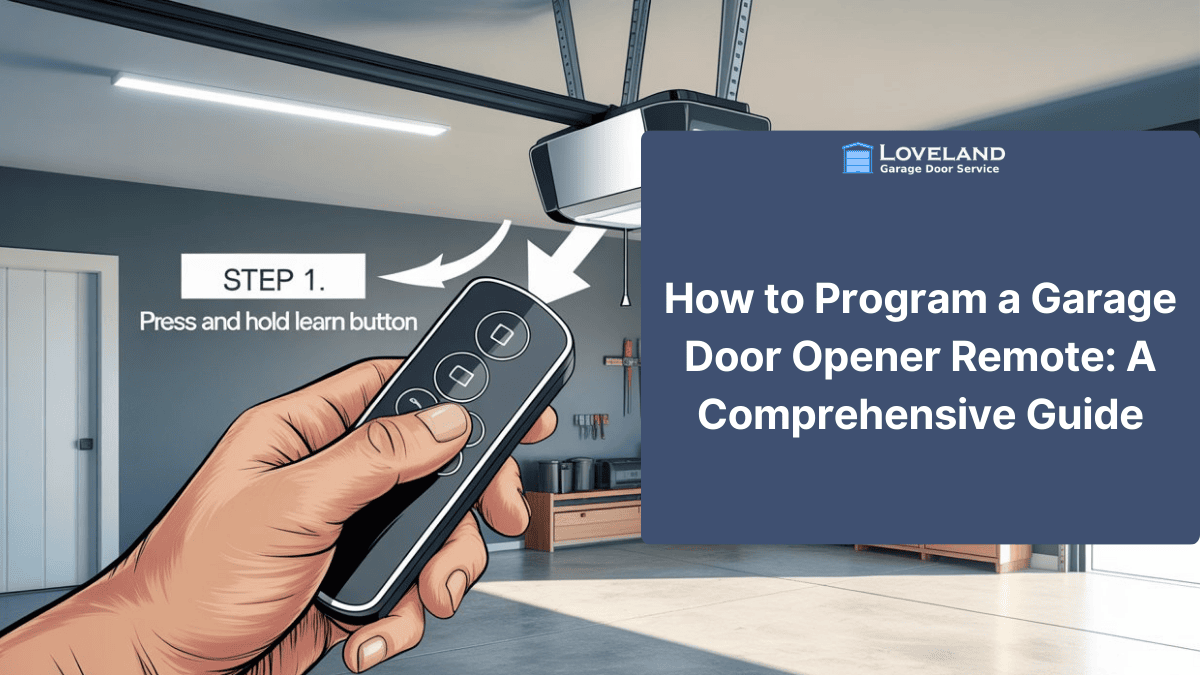
- Activate Learning Mode: Press and release the Learn button quickly (like a doorbell).
- Caution: Do not hold the button down! Holding it for 6–10 seconds will often erase all programmed remotes and keypads from the memory, requiring you to reprogram everything.
- You should see a small LED light next to the button turn on or flash, indicating the unit is ready to pair.
- Sync the Remote: Within 30 seconds of pressing the Learn button, press and hold the button on your handheld remote that you wish to program.
- Wait for Confirmation:
- LiftMaster/Chamberlain: The light bulb on the main opener unit will flash once, or you will hear two clicks.
- Genie: The LED on the motor head will usually stop blinking and stay solid (or turn off), depending on the model.
- Test: Release the remote button and press it again. Your garage door should now activate.
Step 3: Programming a Universal Remote
Universal remotes are great replacements because they work with almost any brand. However, they require an extra step to “tell” the remote which language to speak.
- Check the Manual: Universal remotes often use a series of button presses or internal dip switch settings to select the brand (e.g., “Press the button 1 time for Genie, 2 times for LiftMaster”).
- Set the Brand Mode: Follow the instructions to set the remote to your specific manufacturer.
- Pair with Opener: Once the remote is in the correct mode, follow the Rolling Code steps above (Press Learn on motor -> Press Remote Button).
Step 4: Programming an Older Dip Switch Remote
For many of us in Loveland, the garage is more than a parking spot. It’s where we store our camping gear, mountain bikes, paddleboards, and tools. If a standard door fails, it doesn’t just let wind in; it lets in debris, rain, and hail. A reinforced door acts as a shield, ensuring that your expensive gear (and your car) stays safe and dry, regardless of what the weather is doing outside.
5. Increasing Home Value & Insurance Benefits
If you pop open your remote battery compartment and see a row of 8 to 12 tiny switches, you have a fixed code system.
- Match the Patterns: You must match the switch positions on the remote exactly to the switch positions on the receiver (the box on the garage ceiling).
- Use a Tool: Use a pen or small screwdriver to slide the switches to “On” or “Off” (or +, 0, -).
- Troubleshooting Tip: If you match them perfectly and it still fails, try reversing the pattern on the remote. Some aftermarket remotes have the switch block installed upside down relative to the original opener.
Troubleshooting: Why Won’t My Remote Work?
Sometimes, even after following the steps perfectly, the door refuses to budge. Before calling Loveland Garage Door Service, check these common culprits:
- The “Ghost” Interference (LED Bulbs) This is the most common issue we see today. Did you recently install new energy-efficient LED light bulbs in your garage door opener?
- The Problem: Cheap LED bulbs emit radio frequency (RF) noise that blocks the remote signal. The door might open fine (when the light is off) but refuse to close (when the light is on).
- The Fix: Unscrew the bulbs and test the remote. If it works, replace the bulbs with “Garage Door Compatible” LEDs or standard rough-service incandescent bulbs.
- The “Lock” Button Check your wall control panel (the button mounted on the wall inside your garage). Many modern panels have a “Lock” or “Vacation” switch. If this is engaged, the opener will ignore all remote signals to secure the home. Ensure this is turned off.
- Memory Overload Garage door openers have a limit to how many remotes they can remember (usually 5 to 10). If you have programmed many remotes over the years, the memory might be full.
- The Fix: Hold the Learn button for 6–10 seconds until the LED goes out. This wipes the memory clean. You will then need to reprogram all your remotes and keypads from scratch.
- Damaged Antenna Locate the short wire hanging from the motor unit. It should be hanging straight down. If it is tucked up inside the unit or cut, your range will be severely limited.
When to Call a Professional
While programming a remote is often a DIY task, persistent issues can point to deeper electrical problems. If you have tried replacing batteries, clearing the memory, and removing LED bulbs but still can’t get it to work, the issue may lie in the opener’s logic board or receiver.
At Loveland Garage Door Service, we are here to help. Whether you need a logic board replacement, a new high-security opener installation, or just a professional tune-up to get everything running smoothly, our team has the expertise you need.
Don’t let a stubborn garage door leave you stuck in the rain.
Call Loveland Garage Door Service today (970) 367-8600 for all your repair and installation needs.